引用 DEKO on 2017/08/24 11:02 Thu
当方の互換機では書き込めましたね (以前にやっているので当たり前と言えば当たり前ですが)。
https://twitter.com/ht_deko/status/900537042060197888
で、試して欲しいのは、
1.ブートローターを書き込む配線にする。
2.ブートローダーをもう一度書き込む。
3.この配線で一旦スケッチを書き込む ( [スケッチ | 書き込み装置を使って書き込む] )。
4.スケッチを書き込む配線にする (ATMega328P を抜いた構成)
5.スケッチを普通に書き込む ([マイコンボードに書き込み] ボタンを使ってスケッチを書き込む)。
上記手順です。ひょっとするとコレでイケるかもしれません。
3.の手順については ↓
http://ht-deko.com/arduino/atmega328p.html#05
←実行して見ました。少し長いですが。
スケッチ・Blinkがインストールされて居る
ATMEGA328P-PUに、以下の操作をします
ラインは
PC-[Elegoo UNO R3]-B/Bパターンのユニバーサル基板上「もどき」回路ATMEGA328P-PU
電源ONでBlink(19pinLED)点滅確認
一旦、(1)の結線を解除
1.ブートローターを書き込む配線にする。
結線状態
Elegoo もどき
10ピン->リセット
11 ->17pin
12 ->18
13 ->19
Vcc5V->Vcc
GND ->GND
2.ブートローダーをもう一度書き込む。
(1)の結線を解除後、Elegooにスケッチ[ArduinoISP]を読み込む
結線(1)をセットし、
[ツール]-[ボード];Arduino UNO
[ツール]-[シリアルポート];接続のCOMにチェックマーク
[ツール]-[書込装置];Arduino as ISP
[ツール]-[ブートローダを書き込む]を実行
3.この配線で一旦スケッチを書き込む ( [スケッチ | 書き込み装置を使って書き込む] )。
実行
書き込んだスケッチの動作を確認した。
4.スケッチを書き込む配線にする (ATMega328P を抜いた構成)
結線状態
Elegoo もどき
0ピン-> 2ピン
1ピン-> 3ピン
リセット-0.1μコンデンサ-1ピン
Vcc -> Vcc
GND-> GND
5.スケッチを普通に書き込む ([マイコンボードに書き込み] ボタンを使ってスケッチを書き込む)。
実行時のエラーメッセージ
---------------
Arduino:1.8.3 (Windows 10), ボード:"Arduino/Genuino Uno"
最大32256バイトのフラッシュメモリのうち、スケッチが928バイト(2%)を使っています。
最大2048バイトのRAMのうち、グローバル変数が9バイト(0%)を使っていて、ローカル変数で2039バイト使うことができます。
C:\Program Files\Arduino\hardware\tools\avr/bin/avrdude -CC:\Program Files\Arduino\hardware\tools\avr/etc/avrdude.conf -v -patmega328p -carduino -PCOM5 -b115200 -D -Uflash:w:C:\Users\◎△□\AppData\Local\Temp\arduino_build_192459/Blink.ino.hex:i
スケッチの書き込み中にエラーが発生しました
avrdude: Version 6.3, compiled on Jan 17 2017 at 12:00:53
Copyright (c) 2000-2005 Brian Dean, http://www.bdmicro.com/
Copyright (c) 2007-2014 Joerg Wunsch
System wide configuration file is "C:\Program Files\Arduino\hardware\tools\avr/etc/avrdude.conf"
Using Port : COM5
Using Programmer : arduino
Overriding Baud Rate : 115200
avrdude: stk500_recv(): programmer is not responding
avrdude: stk500_getsync() attempt 1 of 10: not in sync: resp=0xe6
avrdude: stk500_recv(): programmer is not responding
avrdude: stk500_getsync() attempt 2 of 10: not in sync: resp=0xe6
avrdude: stk500_recv(): programmer is not responding
avrdude: stk500_getsync() attempt 3 of 10: not in sync: resp=0xe6
avrdude: stk500_recv(): programmer is not responding
avrdude: stk500_getsync() attempt 4 of 10: not in sync: resp=0xe6
avrdude: stk500_recv(): programmer is not responding
avrdude: stk500_getsync() attempt 5 of 10: not in sync: resp=0xe6
avrdude: stk500_recv(): programmer is not responding
avrdude: stk500_getsync() attempt 6 of 10: not in sync: resp=0xe6
avrdude: stk500_recv(): programmer is not responding
avrdude: stk500_getsync() attempt 7 of 10: not in sync: resp=0xe6
avrdude: stk500_recv(): programmer is not responding
avrdude: stk500_getsync() attempt 8 of 10: not in sync: resp=0xe6
avrdude: stk500_recv(): programmer is not responding
avrdude: stk500_getsync() attempt 9 of 10: not in sync: resp=0xe6
avrdude: stk500_recv(): programmer is not responding
avrdude: stk500_getsync() attempt 10 of 10: not in sync: resp=0xe6
avrdude done. Thank you.
マイコンボードに書き込もうとしましたが、エラーが発生しました。
このページを参考にしてください。
http://www.arduino.cc/en/Guide/Troubleshooting#upload
「ファイル」メニューの「環境設定」から
「より詳細な情報を表示する:コンパイル」を有効にすると
より詳しい情報が表示されます。
---------------------
以上。
ここまでは、この方法のいつものパターンです。
次に
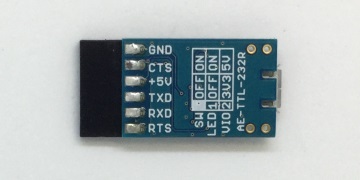
FT232RQをつなぎます
ラインは
PC-FT232RQ-もどき
結線
FT232RQ もどき
GND -> GND
CTS -> GND (Pro miniのGNDにつないで動作するので「もどき」もGNDにつないだ)
5V -> Vcc
TX -> RX
RX -> TX
RTS->0.1μコンデンサ->1ピン
[CTS].[RTS]の扱いがハッキリしませんが、
Pro miniにつないだときは、CTSはGNDにつないで動作しています
実行結果は、エラーで書き込めません。
-------------エラーメッセージ
Arduino:1.8.3 (Windows 10), ボード:"Arduino/Genuino Uno"
最大32256バイトのフラッシュメモリのうち、スケッチが928バイト(2%)を使っています。
最大2048バイトのRAMのうち、グローバル変数が9バイト(0%)を使っていて、ローカル変数で2039バイト使うことができます。
C:\Program Files\Arduino\hardware\tools\avr/bin/avrdude -CC:\Program Files\Arduino\hardware\tools\avr/etc/avrdude.conf -v -patmega328p -carduino -PCOM6 -b115200 -D -Uflash:w:C:\Users\◎△□\AppData\Local\Temp\arduino_build_192459/Blink.ino.hex:i
avrdude: Version 6.3, compiled on Jan 17 2017 at 12:00:53
Copyright (c) 2000-2005 Brian Dean, http://www.bdmicro.com/
Copyright (c) 2007-2014 Joerg Wunsch
System wide configuration file is "C:\Program Files\Arduino\hardware\tools\avr/etc/avrdude.conf"
Using Port : COM6
Using Programmer : arduino
Overriding Baud Rate : 115200
avrdude: stk500_recv(): programmer is not responding
avrdude: stk500_getsync() attempt 1 of 10: not in sync: resp=0xbc
avrdude: stk500_recv(): programmer is not responding
avrdude: stk500_getsync() attempt 2 of 10: not in sync: resp=0xbc
avrdude: stk500_recv(): programmer is not responding
avrdude: stk500_getsync() attempt 3 of 10: not in sync: resp=0xbc
avrdude: stk500_recv(): programmer is not responding
avrdude: stk500_getsync() attempt 4 of 10: not in sync: resp=0xbc
avrdude: stk500_recv(): programmer is not responding
avrdude: stk500_getsync() attempt 5 of 10: not in sync: resp=0xbc
avrdude: stk500_recv(): programmer is not responding
avrdude: stk500_getsync() attempt 6 of 10: not in sync: resp=0xbc
avrdude: stk500_recv(): programmer is not responding
avrdude: stk500_getsync() attempt 7 of 10: not in sync: resp=0xbc
avrdude: stk500_recv(): programmer is not responding
avrdude: stk500_getsync() attempt 8 of 10: not in sync: resp=0xbc
avrdude: stk500_recv(): programmer is not responding
avrdude: stk500_getsync() attempt 9 of 10: not in sync: resp=0xbc
avrdude: stk500_recv(): programmer is not responding
avrdude: stk500_getsync() attempt 10 of 10: not in sync: resp=0xbc
avrdude done. Thank you.
マイコンボードに書き込もうとしましたが、エラーが発生しました。
このページを参考にしてください。
http://www.arduino.cc/en/Guide/Troubleshooting#upload
「ファイル」メニューの「環境設定」から
「より詳細な情報を表示する:コンパイル」を有効にすると
より詳しい情報が表示されます。
--------------以上、メッセージ
という実情で、
疑問がまた、上書きされました。
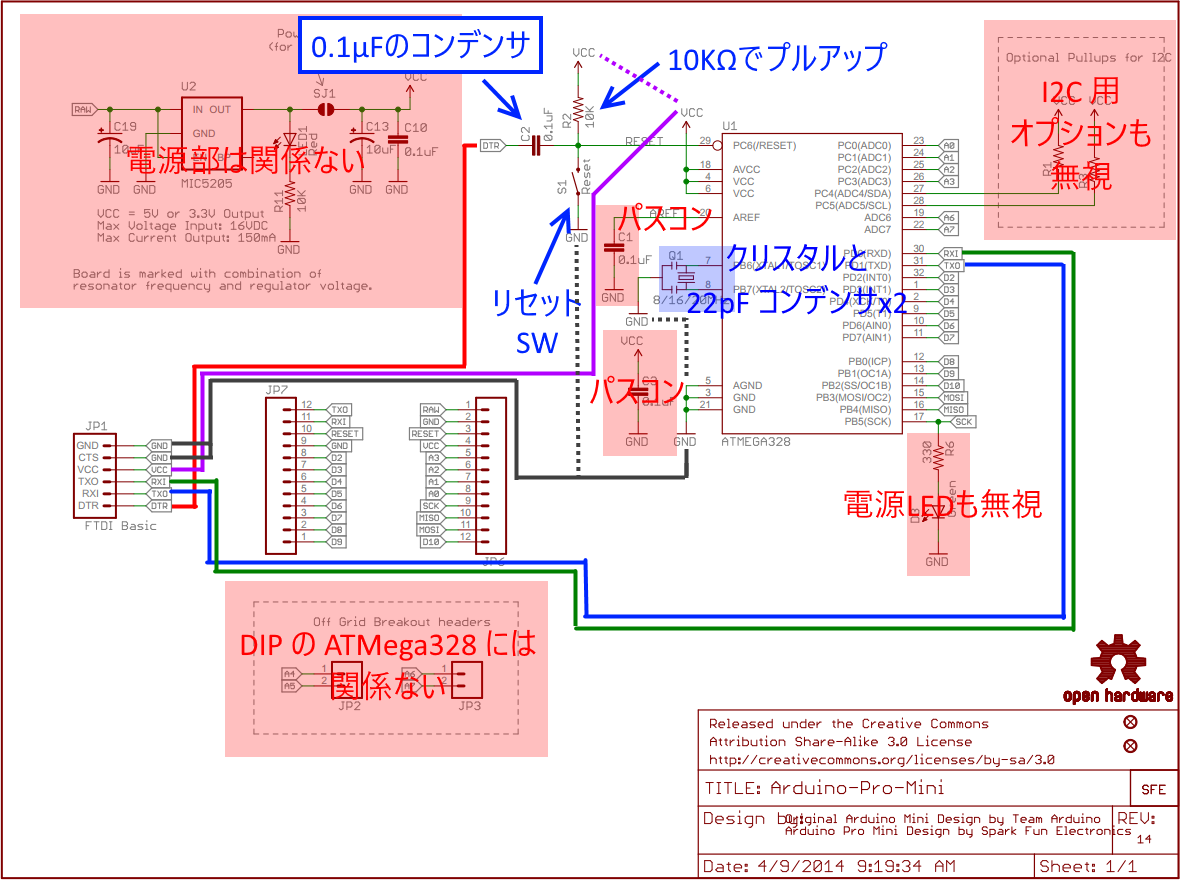
Pro miniに繋ぎスケッチを戻したら
今も目の前で、Blinkが動作しています。
青のLEDがキレイです。小さくいいですね。
お相手頂きましたが、
ここ暫く、こういった状態で、実際は上手く行かない事も有ります。
スケッチ書込の方法は
ブートローダー書き込みの手法で書き込めるの、何も使えないと言うことでは
有りません。
また、
Webで紹介されていたPro miniは、USBシリアルインターフェースが要るとはいえ
ほぼ郵便切手大で、UNOと同じ動作をする様です。
I/Oピンをすべて使ったスケッチなどを使う事も有りませんし
現状、それ程の能力も有りません。
Pro miniでも、1602LCDにI2cで信号を送れる事も確認しているので、
もう。Pro miniで事足りる気もいたします。
まだ、組み込み回路を作れないので、
スケッチの書込はArduinoをいじる場合、頻繁です。
ですので
お勧めではない様ですが、私の場合はNANOでも良さそうです。
NANOなら、USBケーブルで足ります。
Windows10なら、ドライバの問題も無さそうです
有っても、ドライバをインストールすれば良さそうですし。
安定に動作すれば、良いのです。
NANOはまだ、試してませんが。
いろいろお時間、頂戴しましたが、
結論は『互換機だからだろう』で収めましょう。
Elegooのサポートにも、メールしましたが、
とんちんかんな返答が一度有っただけで、こちらの問題は全く解消されません。
純正品は使って無いので、なんとも100%では判断出来ませんが、
これは、いわゆる「互換機の問題」かもしれません。(スッキりしませんが・・・・)
『地図があったので、実際行ってみたら、道が通れなかった』
脇道があった、脇道を通れたので、事故にも遭わず、実際は問題はなかった。
でも試す(実際に行ってみるまでは)までは、判らないことだったので、ひとつ経験を積んだ。
今回の場合は、本道が通れて、脇道はダメだったので、また本堂に戻ったという
事ですが・・・
と言うことでしょう。
ありがとうございました。
|

